I
have had 2 of these cameras with failing shutters. The Belair is no
longer produced, but as it was not cheap at all, I hoped for a repair
service. I wrote to Lomography for help or some hints at
least, but they said that they could not help at all. Then I asked a
big photography forum for help, but there was no answer. So I opened
the shutter housing and that's why I have made this
page about shutter repair.
My shutters had different issues. The first camera opened the shutter
wide for a very short moment, but did not react to any light or ISO
setting. The LED did not light although I put fresh batteries.
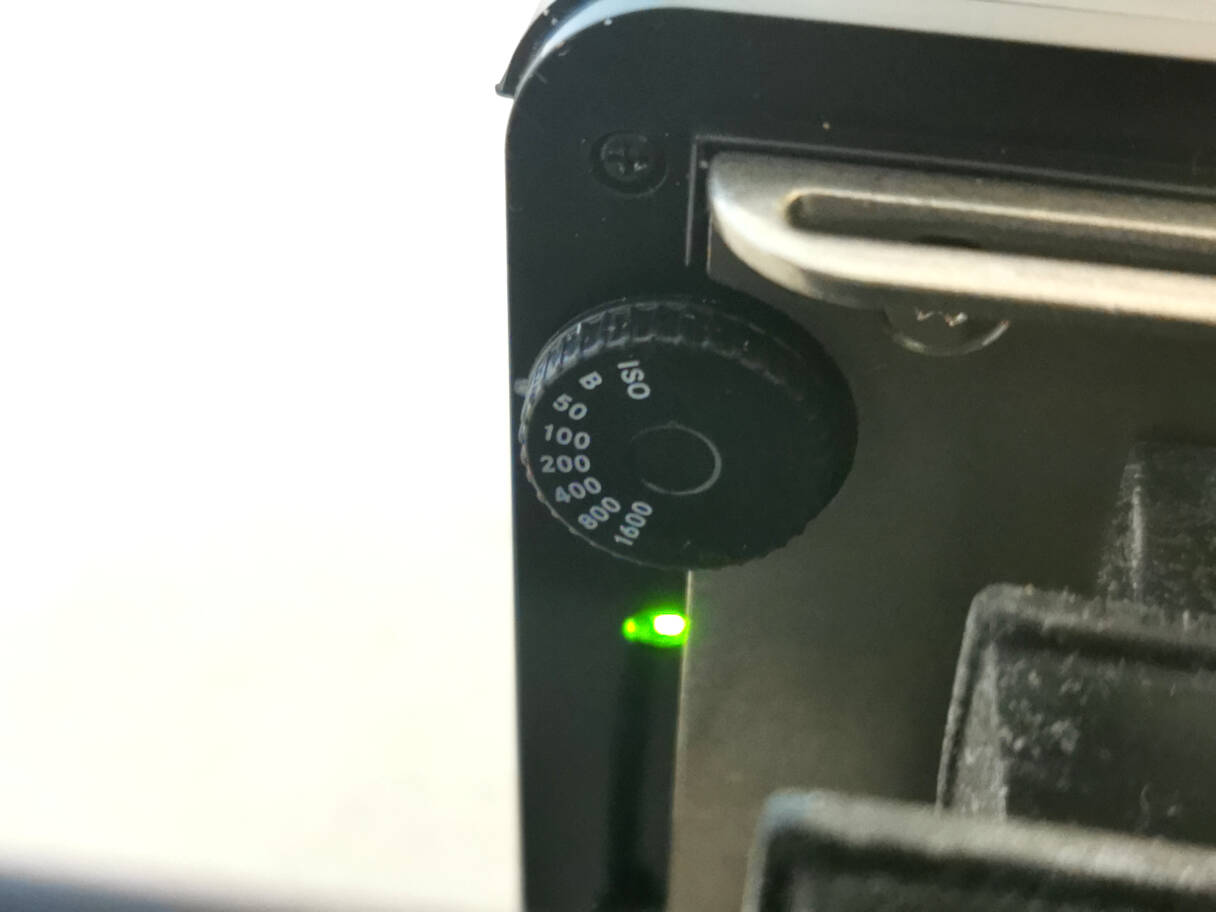
Film speed setting at the back of the lens board. Half
pressing the shutter button lights a LED. No light = battery problem.
With no or faulty batteries, the shutter opens at a fixed speed of
1/125s. In this case B will not work, it's 1/125 as well.
As mine did not light up, there was a battery problem. So I opened the
shutter housing. Disclaimer: You should know what you do, and have the
appropriate skills. It's all cheap plastic, tiny parts, springs,
electronics and cables. You can easily ruin it all beyond repair. So be
cautious, make photos before unmounting anything and handle with care.
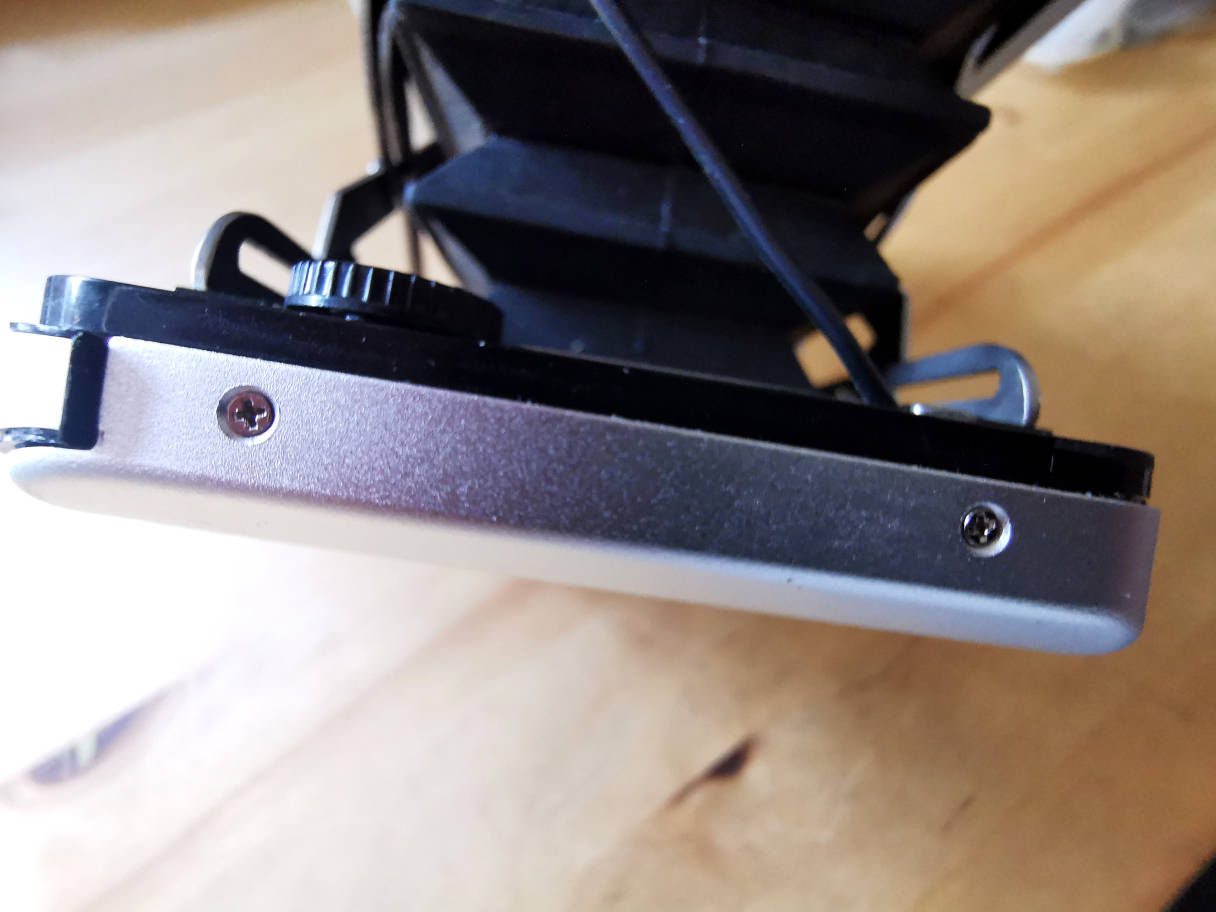
There are 2 tiny, tiny silver screws to each side which have to be removed, 4 in total.
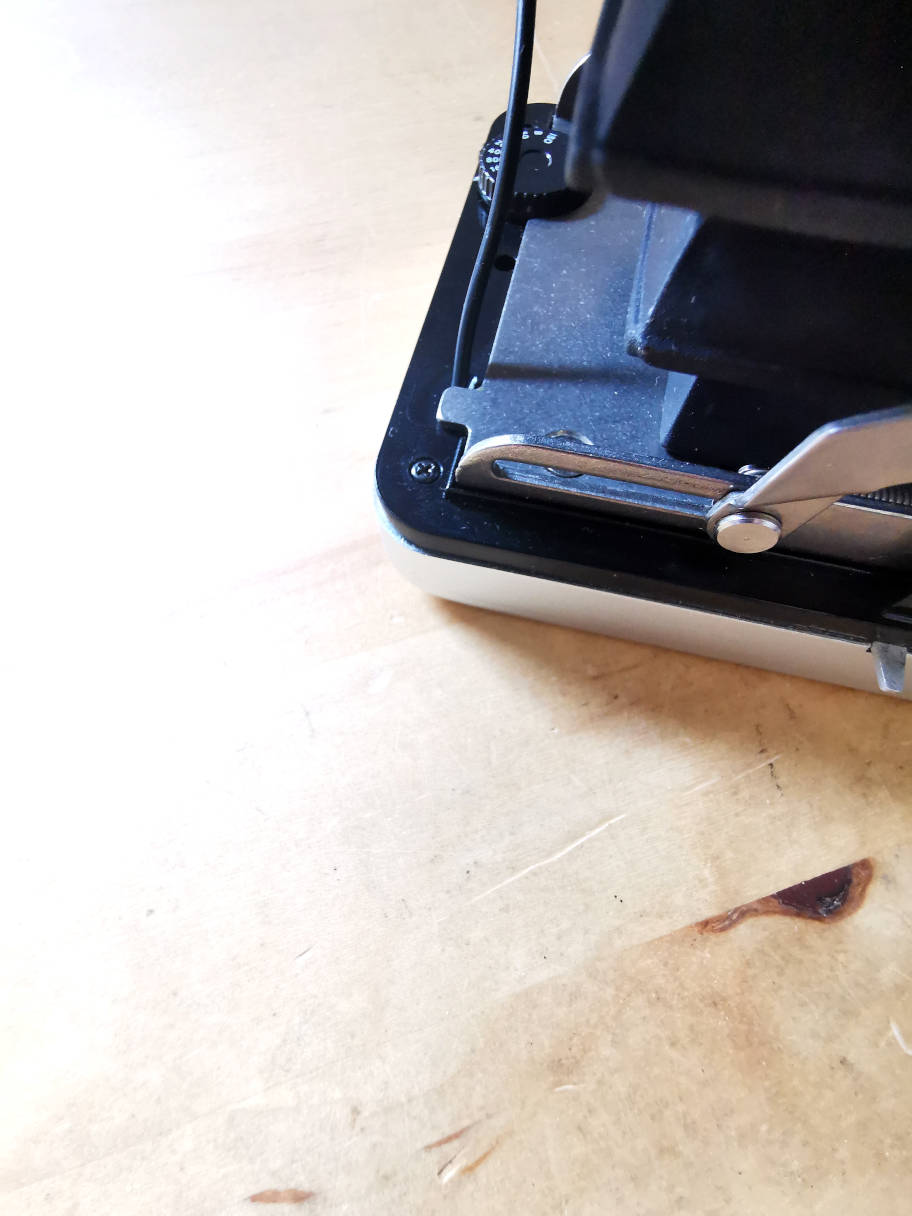
Then there are 4 tiny black screws at the back of the shutter housing
which sit near to the corners. Access is not easy because there is not
much room between the camera body and the shutter housing. I used a
very tiny flat-blade screwdriver although they are cross-head screws.
Now, with a little wiggle, you can take off the lid of the housing.
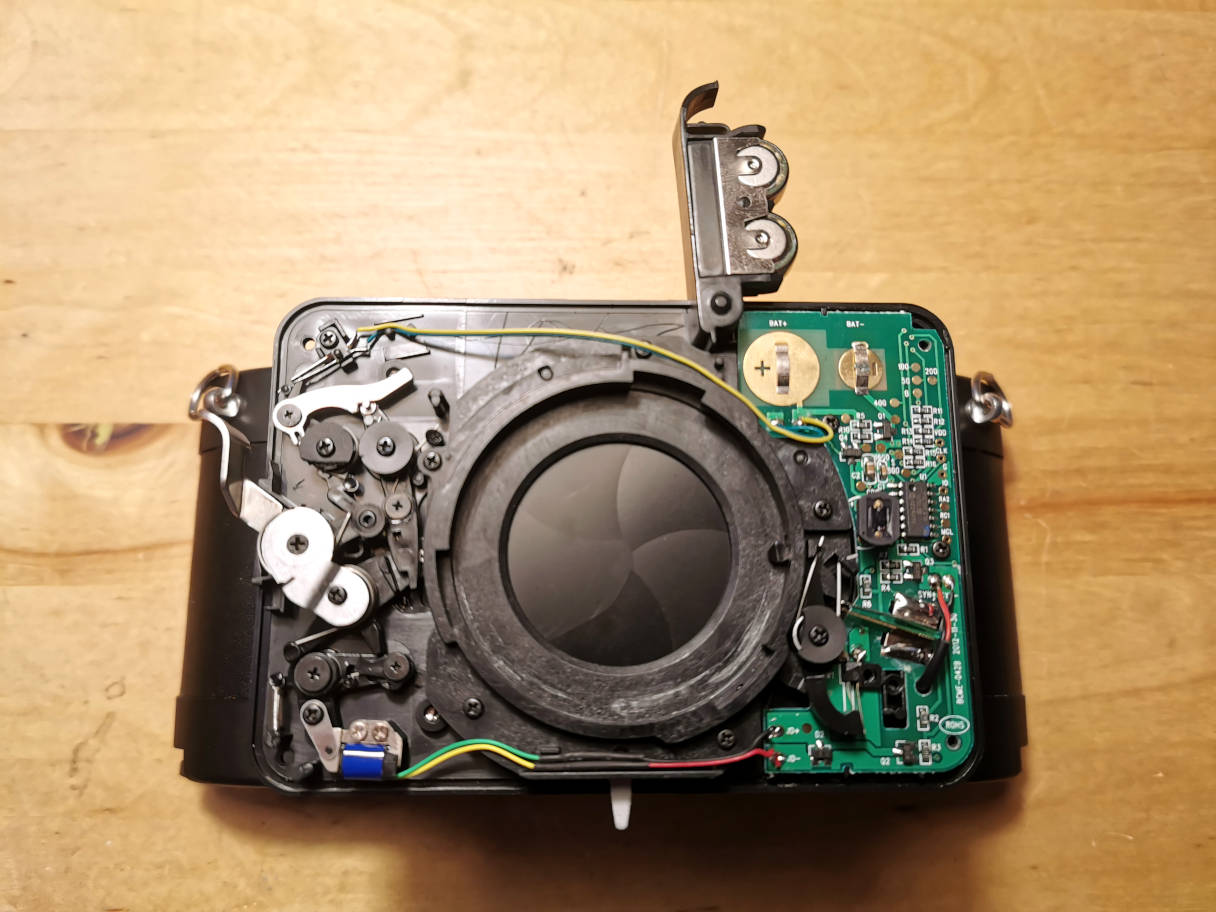
Shutter housing open.
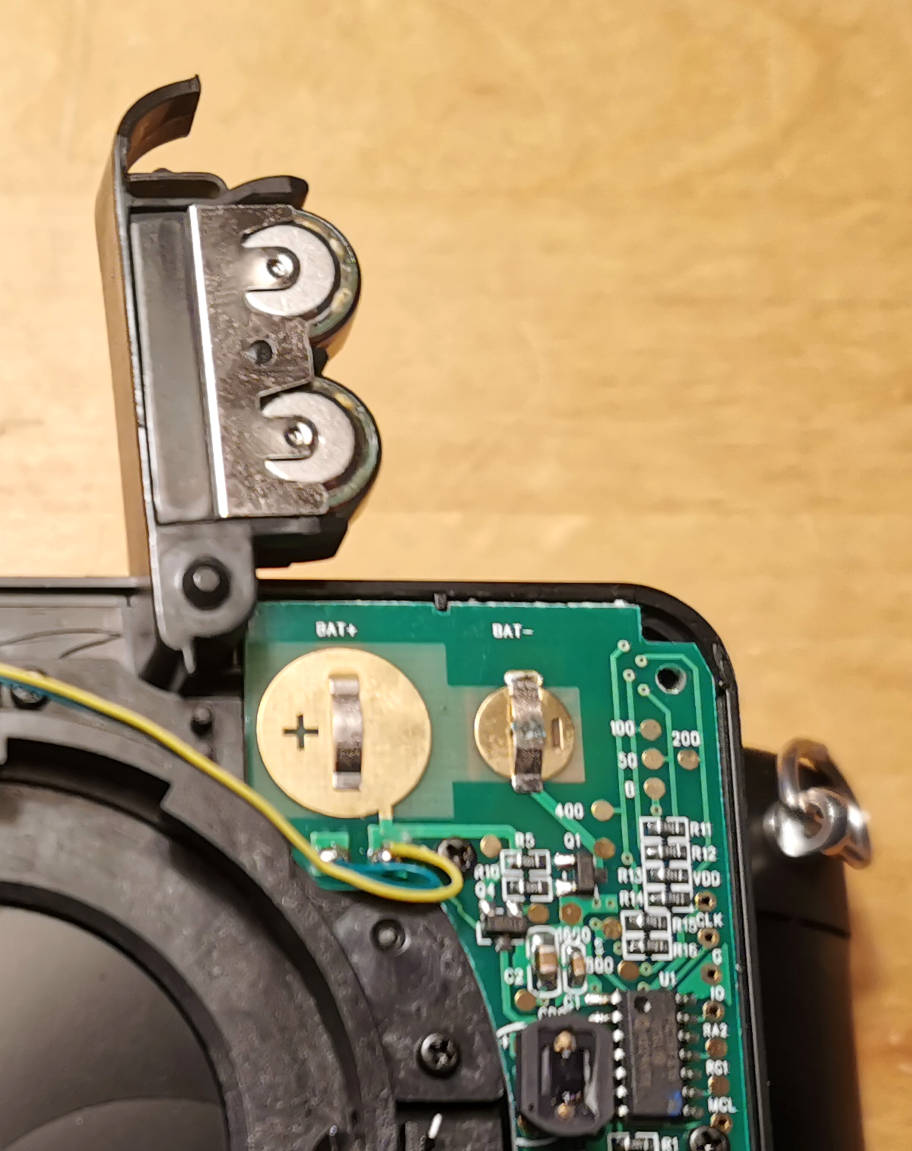
Battery part of the shutter housing. The battery carrier puts the
batteries directly onto the contacts of the electronic board. There was
only a little bit of oxidisation, hardly visible, on the contacts, but
enough to put the cicuit out of order. A little scratching with a knife
and it worked again. BTW: the carrier has indications how to put the
batteries correctly, but the + and the - are black on black plastic.
So that was it for this one. Remount the housing and it's done. If the
camera is stowed away for a longer time, remove the batteries or lift
the carrier at least.
The second shutter did not open wide, the shutter blades only flinched
a little bit at the center, far from opening and hardly visible. I did
not find a solution myself. But on the big forum a user had the same
problem and took the courage to dismount parts of the shutter. The
thread is here (link opens in a new window). He describes how to do it. He kindly gave me the permission to use his gifs, so here is how the failure looks like and here how the shutter opens correctly (gifs open in a new window). Thank you @wwswms !
So I tried it myself.
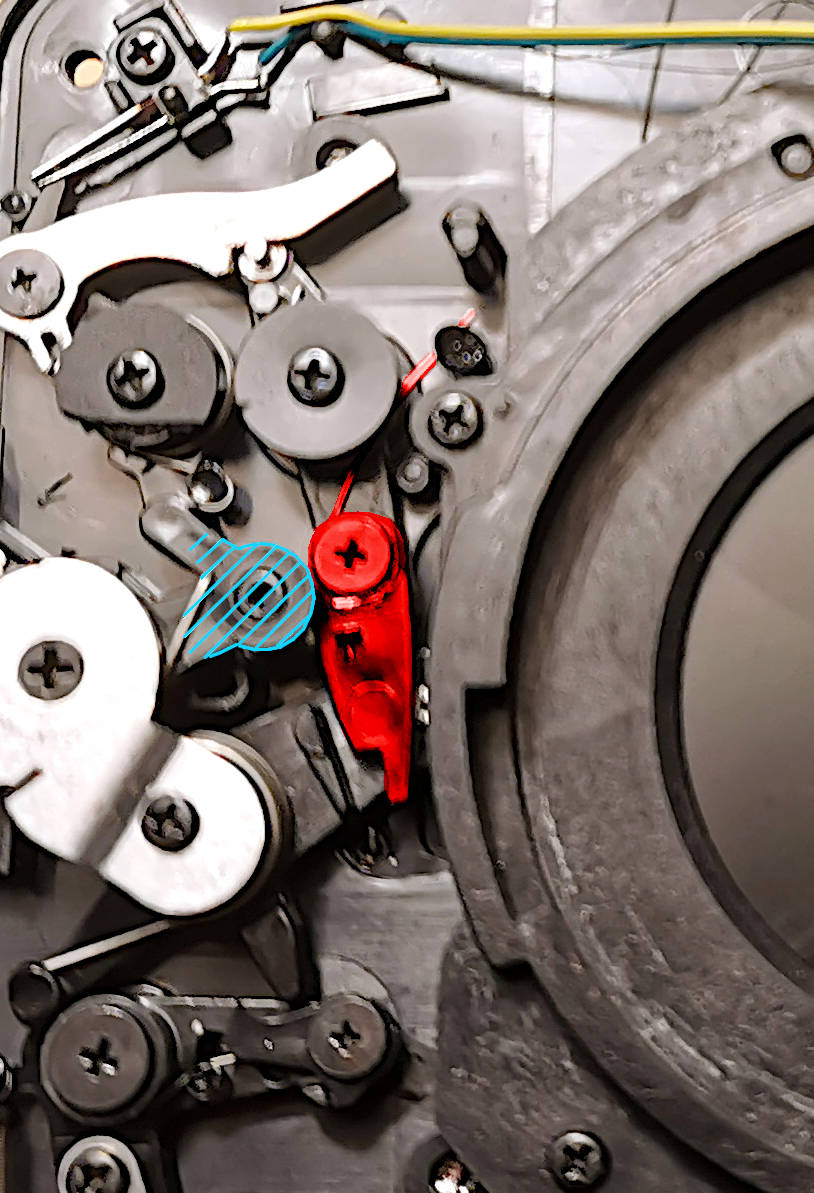
The reddened part is the culprit.
It is only held by one screw. But be cautious, there is a spring under
it and remounting is quite difficult. The spring has to be hooked to
the part and then be put into place. You would wish you had 4 tiny
hands as the part hatched in blue has to be moved away a bit. It moves
by pushing the shutter lever only a very little bit.
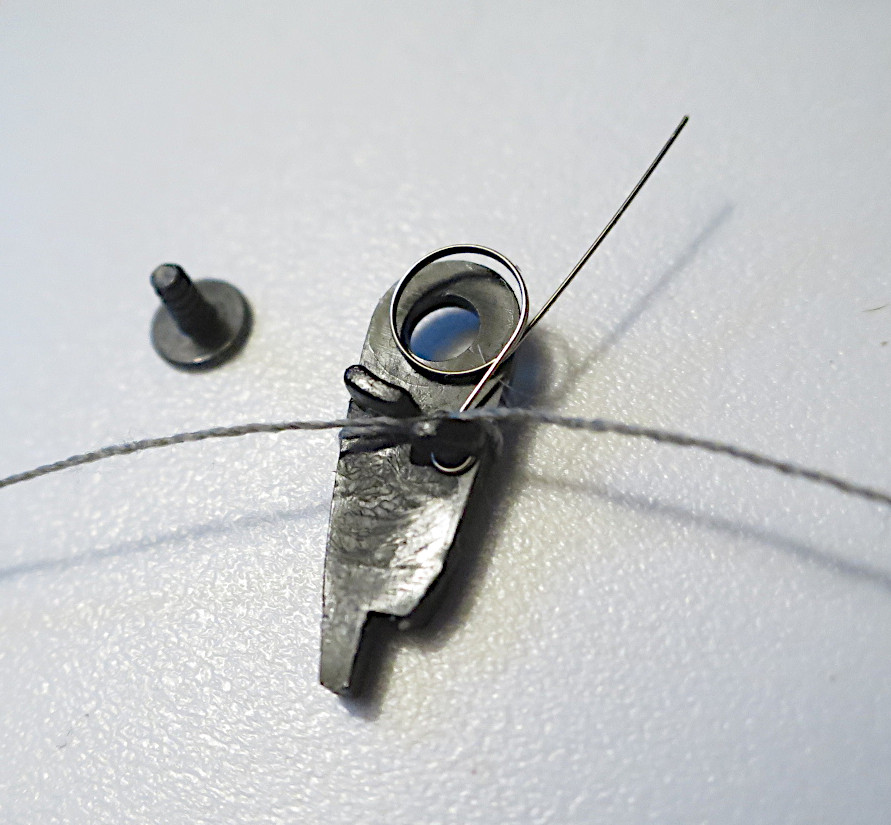
So I fixed the spring to the hook and bound it to the part with a sewing thread.
You can now put the part into its place without losing the spring.
Rescrew, then loosen the screw one or 2 turns and cut the sewing
thread. Remove the thread, rescrew for good. Test the shutter. It might
be necessary to put the front part of the housing into place for
testing. If it's all fine, rescrew the housing.
One last remark: There are cameras with a faulty LED. So it might work
without without lighting up. Put the ISO setting to B, press the
shutter lever down and hold it. If the shutter stays open, it's fine.
Hope it helps.